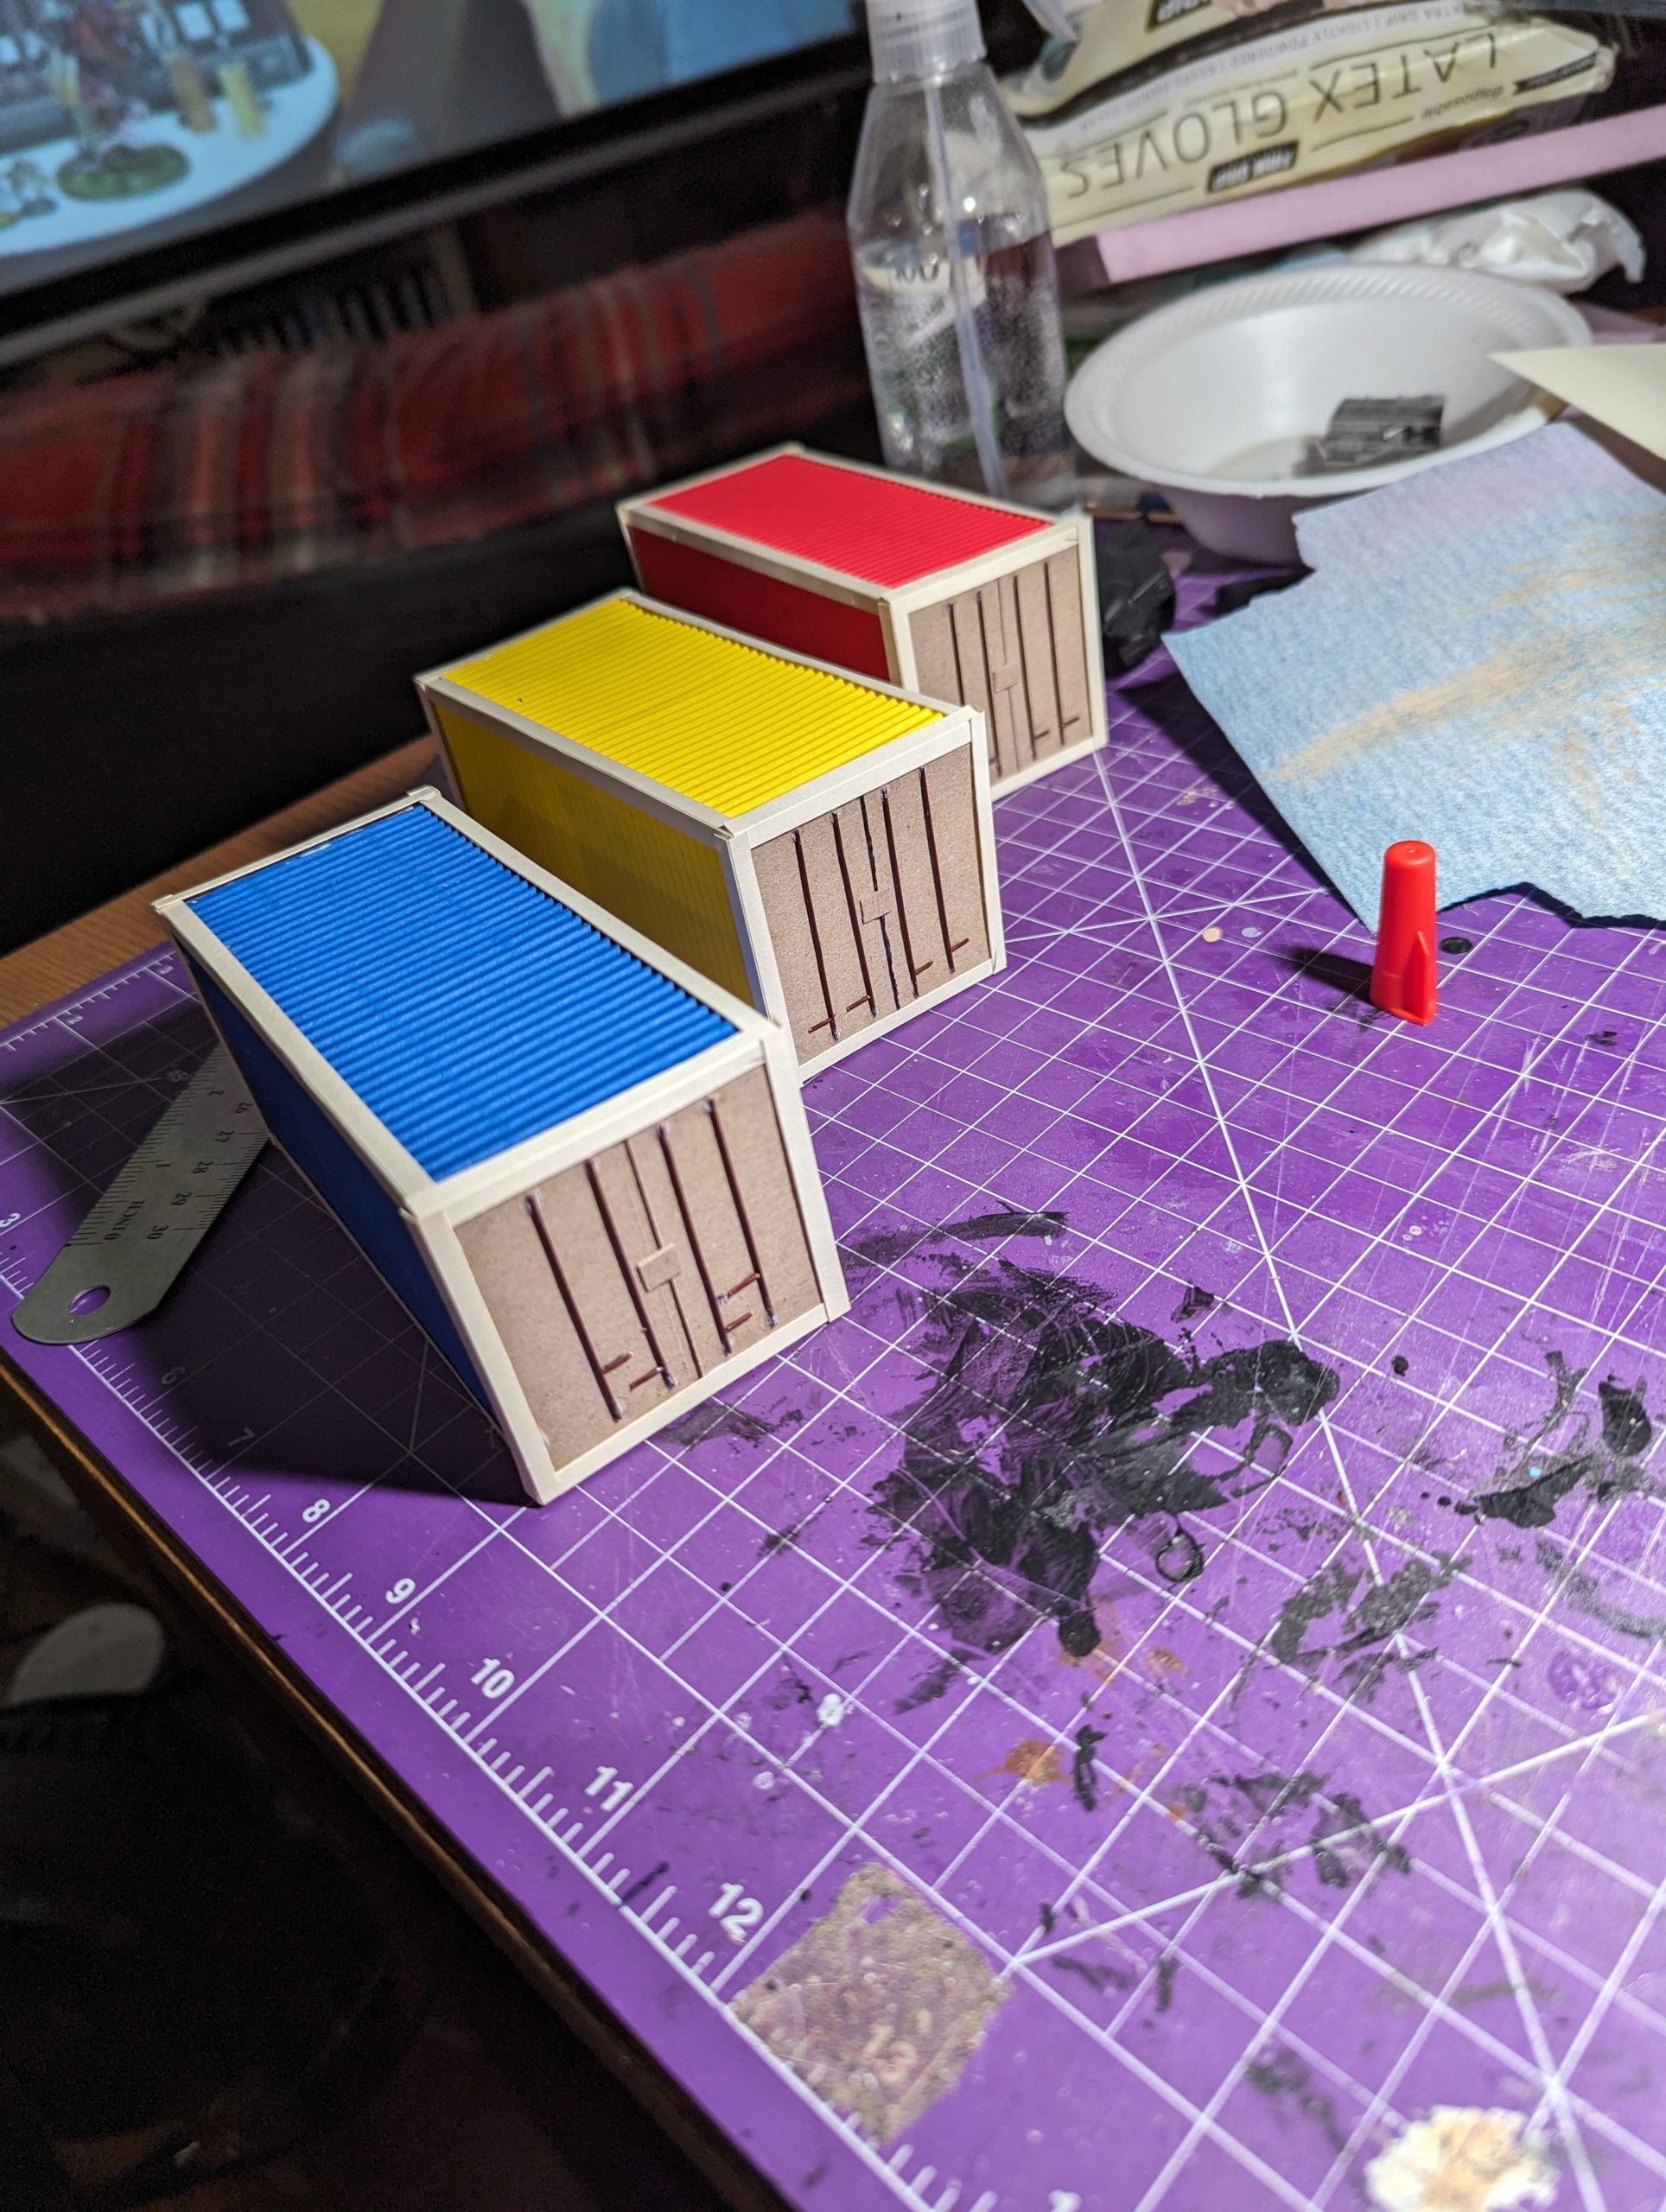
So there I was, in the middle of arranging my 30 year old VF-1J Super Valkyrie model, plans awhirl to create half a dozen pieces of scatter terrain, when my shipment of craft corrugated cardboard arrived early. TL;DR I got a little distracted and accidentally put together three complete shipping containers in 8 hours, including breaks.
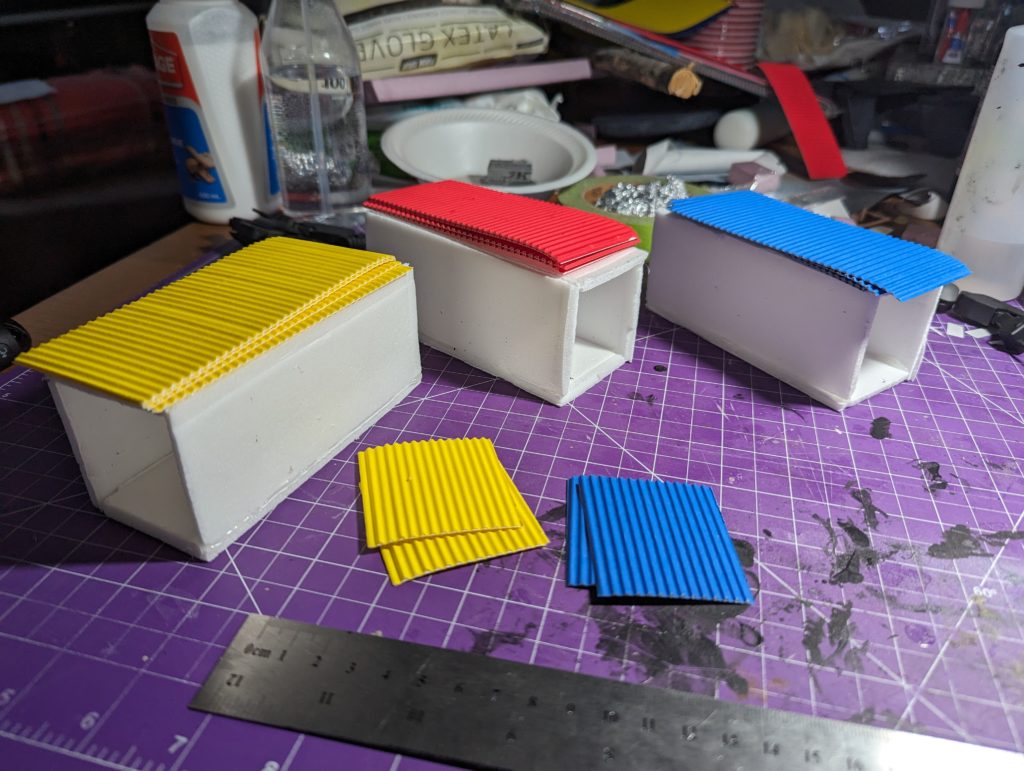
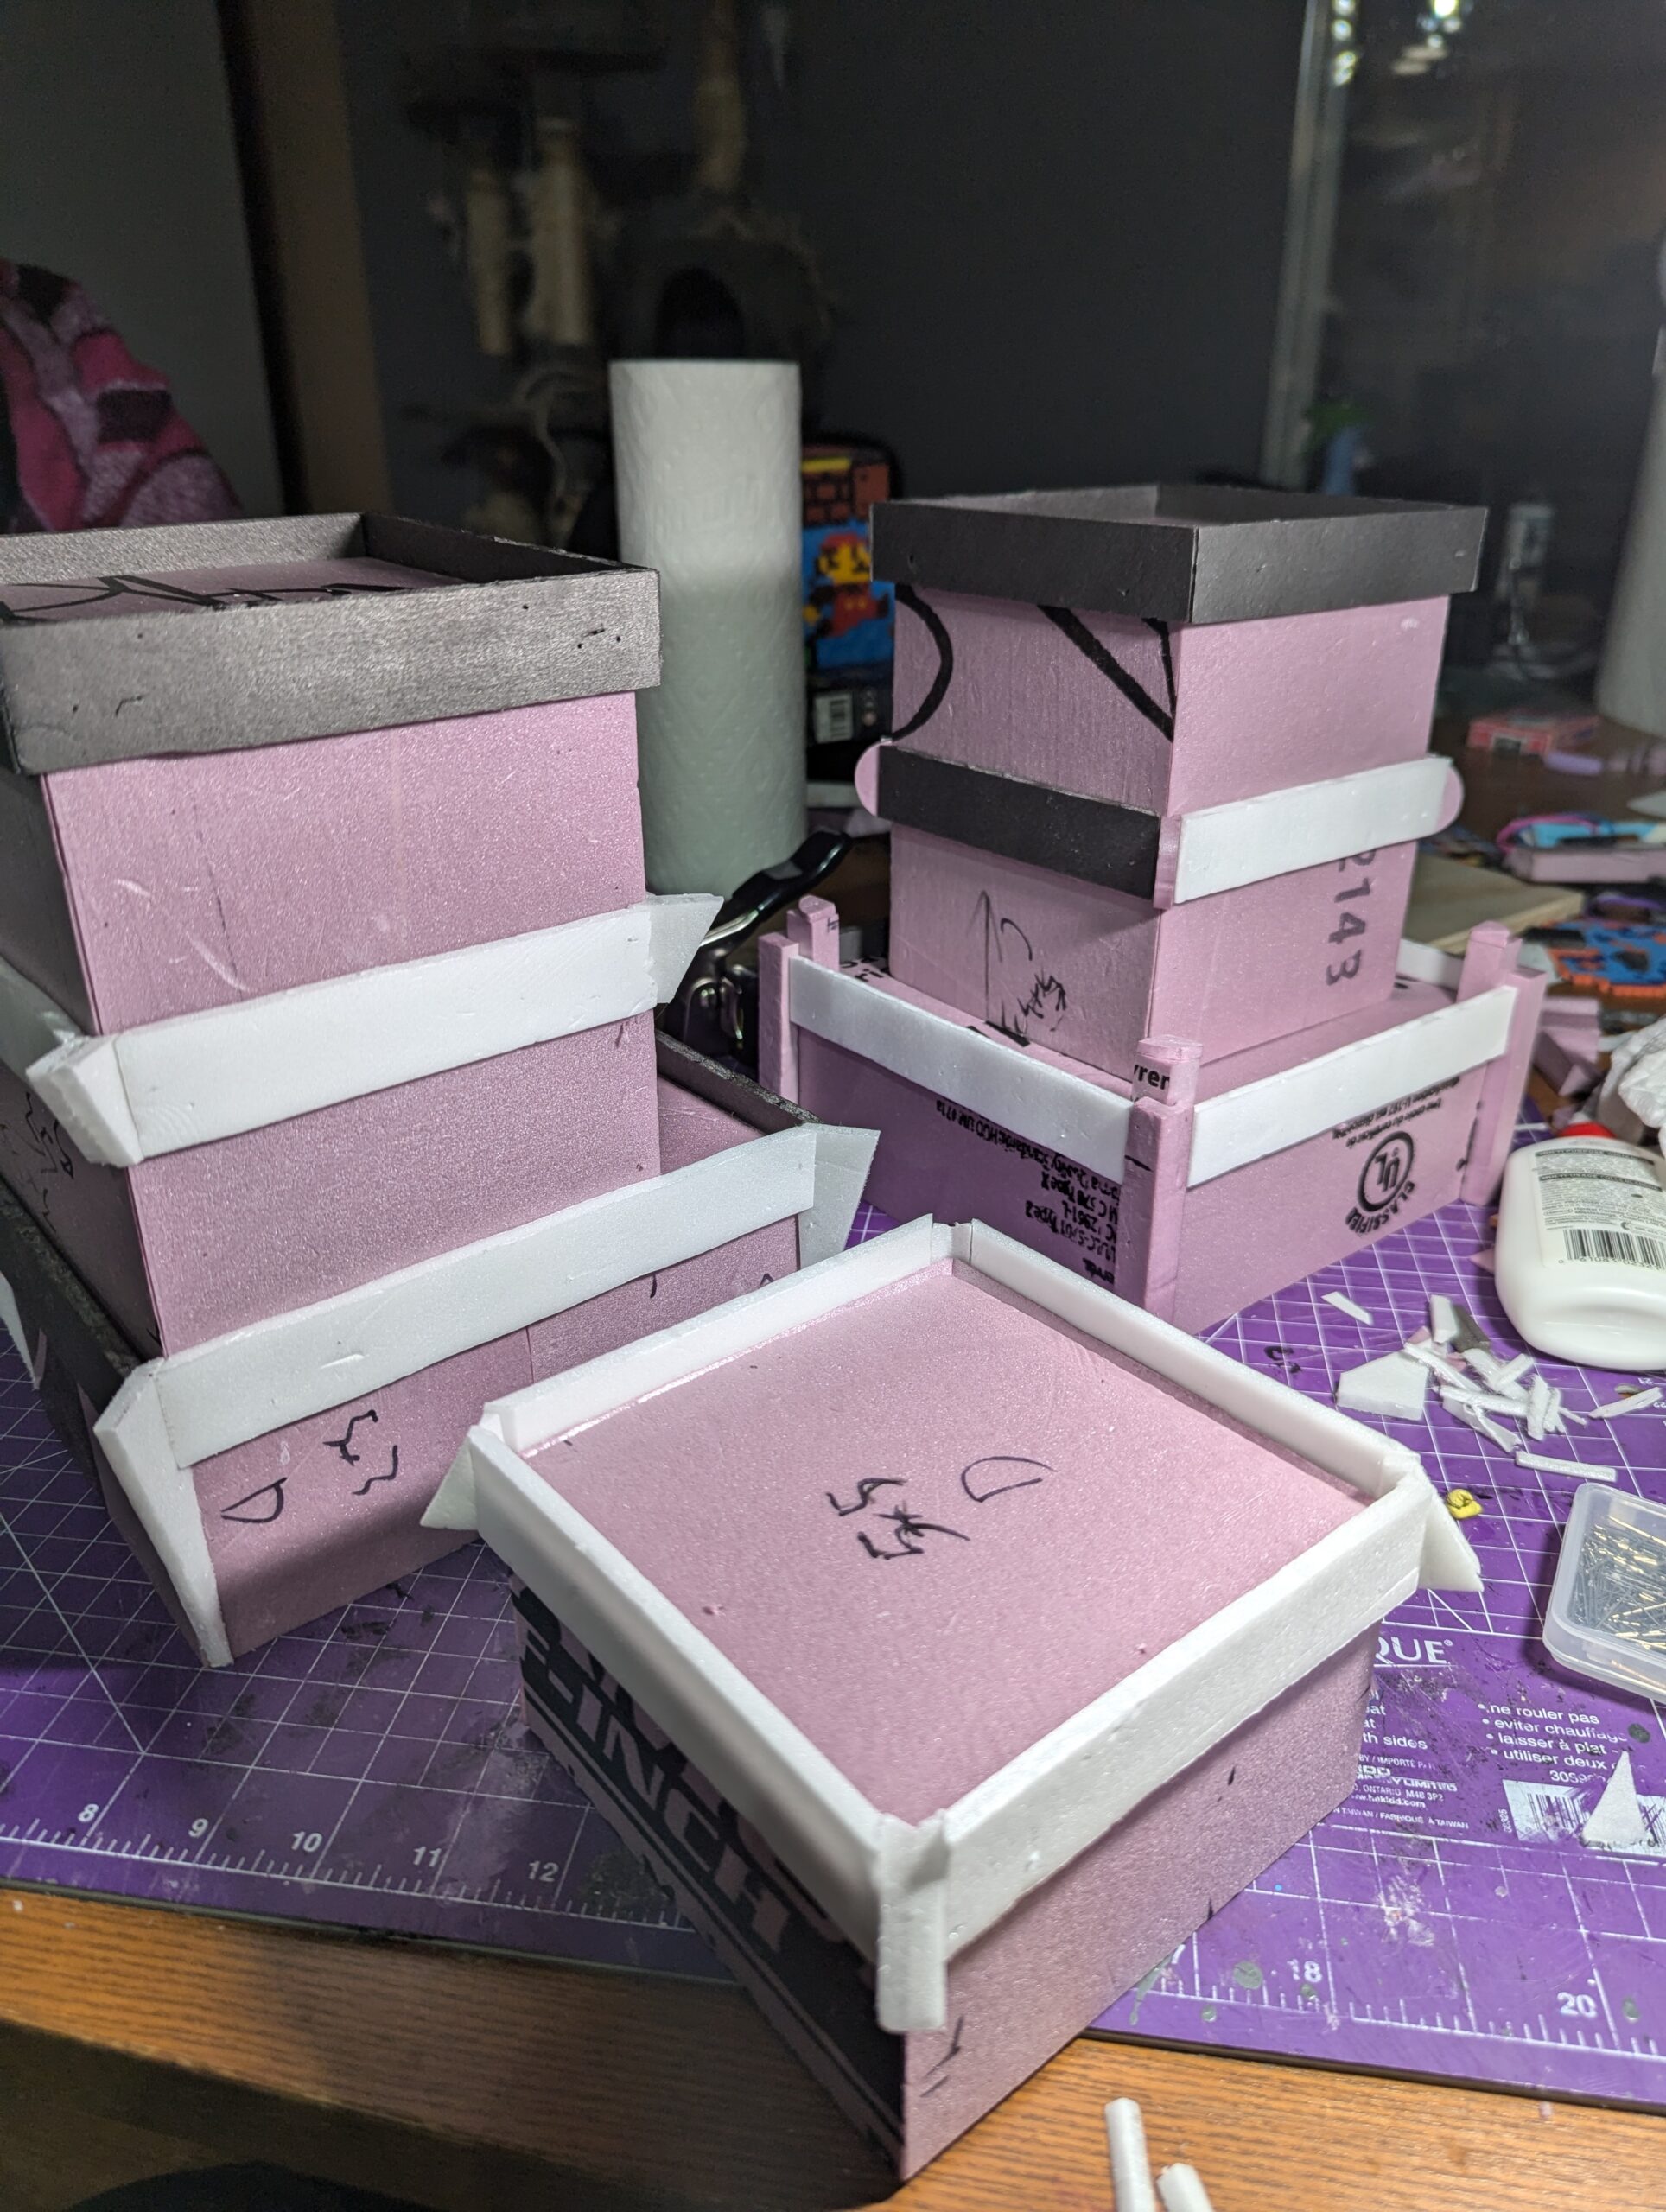
Because I don’t have a proxxon or the 2-inch foam I’d need to cut a properly square interior block, I started with hot glued slabs of foam board cut with a steel ruler and a slightly dull x-acto. I managed to get surprisingly close to 90 degree angles by butting them up against some primer bottles. The corrugated cardstock went on next with white glue because foam and superglue don’t get along. While I’m a little mad I can’t find the wavy plastic stuff in the stores, I paid little enough for a 10-pack of sheets that will last me… well, I would have said years before Christmas. But we’re on week 5 of unremitting hobby productivity and I’ve already burned down not just as many minis painted as I managed in all of 2023, but nearly as many pieces of terrain as I’ve made, ever. So, anyway, I have a bunch of corrugated cardstock left and some potential plans to use them.
The two ways to add character to a shipping container are via paint and via the doors. Lots of modern seacans have doors that have interesting shapes. But, I’m still barely capable of cutting a straight line, much less carving out 6 copies of symmetrical and identical complex doors. Plenty of seacans have boring flat doors, and I’m way more of a painter than a sculptor (not that I’m much of either), so my goal was to get a door that read convincingly of shipping containeritude from a distance. I slapped some “doors” on the base panel, added a latch, and then spent rather a while carefully supergluing wire to them to represent the lock bolts.
Quick tip to straighten wire; clamp one end of it at an angle in the chuck of your drill, with the long side coming out the middle. Grip the other end with some pliers. Run the drill briefly. You’ll spin the wire a bit, which weakens it and can break it, but also makes it nice and straight!
I spent far too long cribbing together a jig out of cardboard to hold the wire in place while I glued it, until I realized all I needed was to mark the end points, dab those with some superglue, and I could squooge the wire into place with my fingers or pliers. The locking handles were much smaller so I marked the open and closed positions for variety, cut a maddening number of ~5mm lengths, 20%+ of which immediately flew off into the dark, and used a set of needle nosed pliers to grip them, dip one end in superglue, and place them horizontally.
Then I cut like two dozen 8mm strips of cardstock, scored and folded them at 4mm, and used white glue to slap them over all the corners to hide my extremely rough edges. Why 8mm specifically? I needed to make sure they didn’t overlap the lock bars in the doors. It was a pain. Anyway, that finished the build project off. I’ll come at them again with some superglue to hold down some of those loose ends on the cardstock, but then it’s primer and paint time! (by which I mean getting distracted by the Valkyrie and building the scatter terrain I meant to get done this weekend)
A surprisingly productive day. I think it’s the first time I ever started and finished a terrain build in a single day. Usually I spread myself out a little for variety. It was good, though I think I’ll stick with the gong show that is having three or four projects on the go at once. As long as I finish one project before adding another one, I actually get them done at a good pace.
One thought on “Accidental one-day build of shipping containers”
Comments are closed.