Introduction
Every mini painter I see on YouTube- and most “post your area” threads on reddit- has a battle station wall of paint in dropper bottles, from entry level “to paint Ultramarines you need this triad of blues” to a half dozen brands’ take on fluorescent orange. When I got started, I had an introduction kit from Citadel (despite not having painted a wargaming figure until this year) and I moved into that “normal” progression of buying a 30ml dropper bottle of orange because I needed orange, then flesh tones, then metallics, etc., etc. I want to start out by saying there’s nothing wrong with that, I recommend you stick with that if it works for you, and that I’m not talking about CMYK painting because I think it’s better. There’s some contexts in which it might work better for some people, but it adds a level of complexity to the hobby that I think most people don’t need. But maybe some people want to hear about it, so I’ll talk about what I did, and how, and why.
What is CMYK and how does it apply to painting?
CMYK refers to Cyan, Magenta, Yellow, and blacK, and it’s used by printing houses and colour inkjet printers and artists and colour nerds, none of which I am- or I didn’t start that way, at least. If you have a white canvas, some combination of those four colours at some opacity will get you every colour you’ll see in print. In miniature painting there are some subtleties to using CMYK, but the general principle is that you only need a half dozen paints to paint anything you want.
Except it’s not that simple. What you need is four pigments, and many paints have two or more pigments. Nearly anything that comes in a range of dropper bottles that are sold to mini painters are pre-mixed combinations of pigments. Combining, for example, a pre-mixed light blue (with two pigments, white and cyan) and a pre-mixed dark red (with black, yellow, and magenta), you’ll very quickly get a muddy brown. On the other hand, mixing a single pigment cyan with a single pigment magenta will get you a purple. Adding white or black to that purple will make it lighter or darker (or both, for greyer). In order to paint with CMYK, you need single-pigment paints, and you need to accept that matching a colour perfectly is unlikely.
If you want to paint an army and you run out of a personal pigment mix halfway through, you probably won’t have matching units. CMYK painting adds a new skill or set of skills to the hobby. Flesh tone mixes are tricky to nail down at first. The amount of paint you need is much less than you’ll start squirting out, but you’ll end up using so little that “waste” doesn’t really enter into the spending equation. CMYK will force you into a better understanding of colour and how to use it on your models. Shadows get more interesting. You’re likely to fall into a rabbit hole of colour theory and your models will look more interesting as a result.
You will spend slightly more to get started and, in the long run, a small fraction of what other folks are spending on paint.
Why did I start (and keep) using CMYK?
I grew up way out in the country where zombie-prepper self-sufficiency obsession sounds perfectly normal, because sometimes the power lines or roads really would be closed for weeks at a time. I enjoy city living and high tech now, but I still take knee-jerk offence when I am asked to pay for things I can make myself for cheap. I have (and still have) fairly limited space for my hobbies. I have painted only individual figures and not armies (until this year). When I realized I could trade a shopping bag full of paint for 4 tubes (actually 8, as it turned out) and never buy $5/bottle miniature paint again (actually I still buy metallics), I was interested. When I finished my first model with a vibrant purple I’d never seen on the shelves, I gave away all my pre-mixed paint.
I’ve kept using CMYK because I have no interest in the purchases I’d have to make to replace it. I like mixing my own paint, and after a few years of it it’s become as easy as breathing. I’m not a master of it- I still default to simple primaries too often without using tone or shade- but it has saved me a tremendous amount of money and given me substantially more control over my colours and new ways to express myself creatively. It has not saved me time or effort.
I paid perhaps $75CAD for pigments, $50 for mediums and agents, and $20 for bottles three years ago. I am not the world’s best or most constant painter, but I have been enjoying painting regularly and I’m not even halfway through my tubes of CMY. Black and white I go through much faster, for a variety of reasons, but after the initial outlay it’s been very affordable. I’ve had few problems with constantly colour-matching because I ignored wargaming and only painted heroes and monsters for TTRPGs for several years. I started painting and scratch building some wargame armies this year (OPR has gotten me into some second-hand Ork models, for example), but by this point I’m confident in my ability to get a reasonable colour-match, or to build armies with colours close enough to identical to satisfy myself. I didn’t have an interest before now and it wouldn’t have worked earlier.
CMYK works brilliantly, for me, in my context. Others I’ve talked to have been interested because they like colour theory, or making their lives harder, or they have a very constrained space for painting, or they live in more remote areas and can’t just pop down to the hobby store to buy a triad when they feel like it, or wait two weeks before moving on to their next mini. ymmv.
How to get started with CMYK.
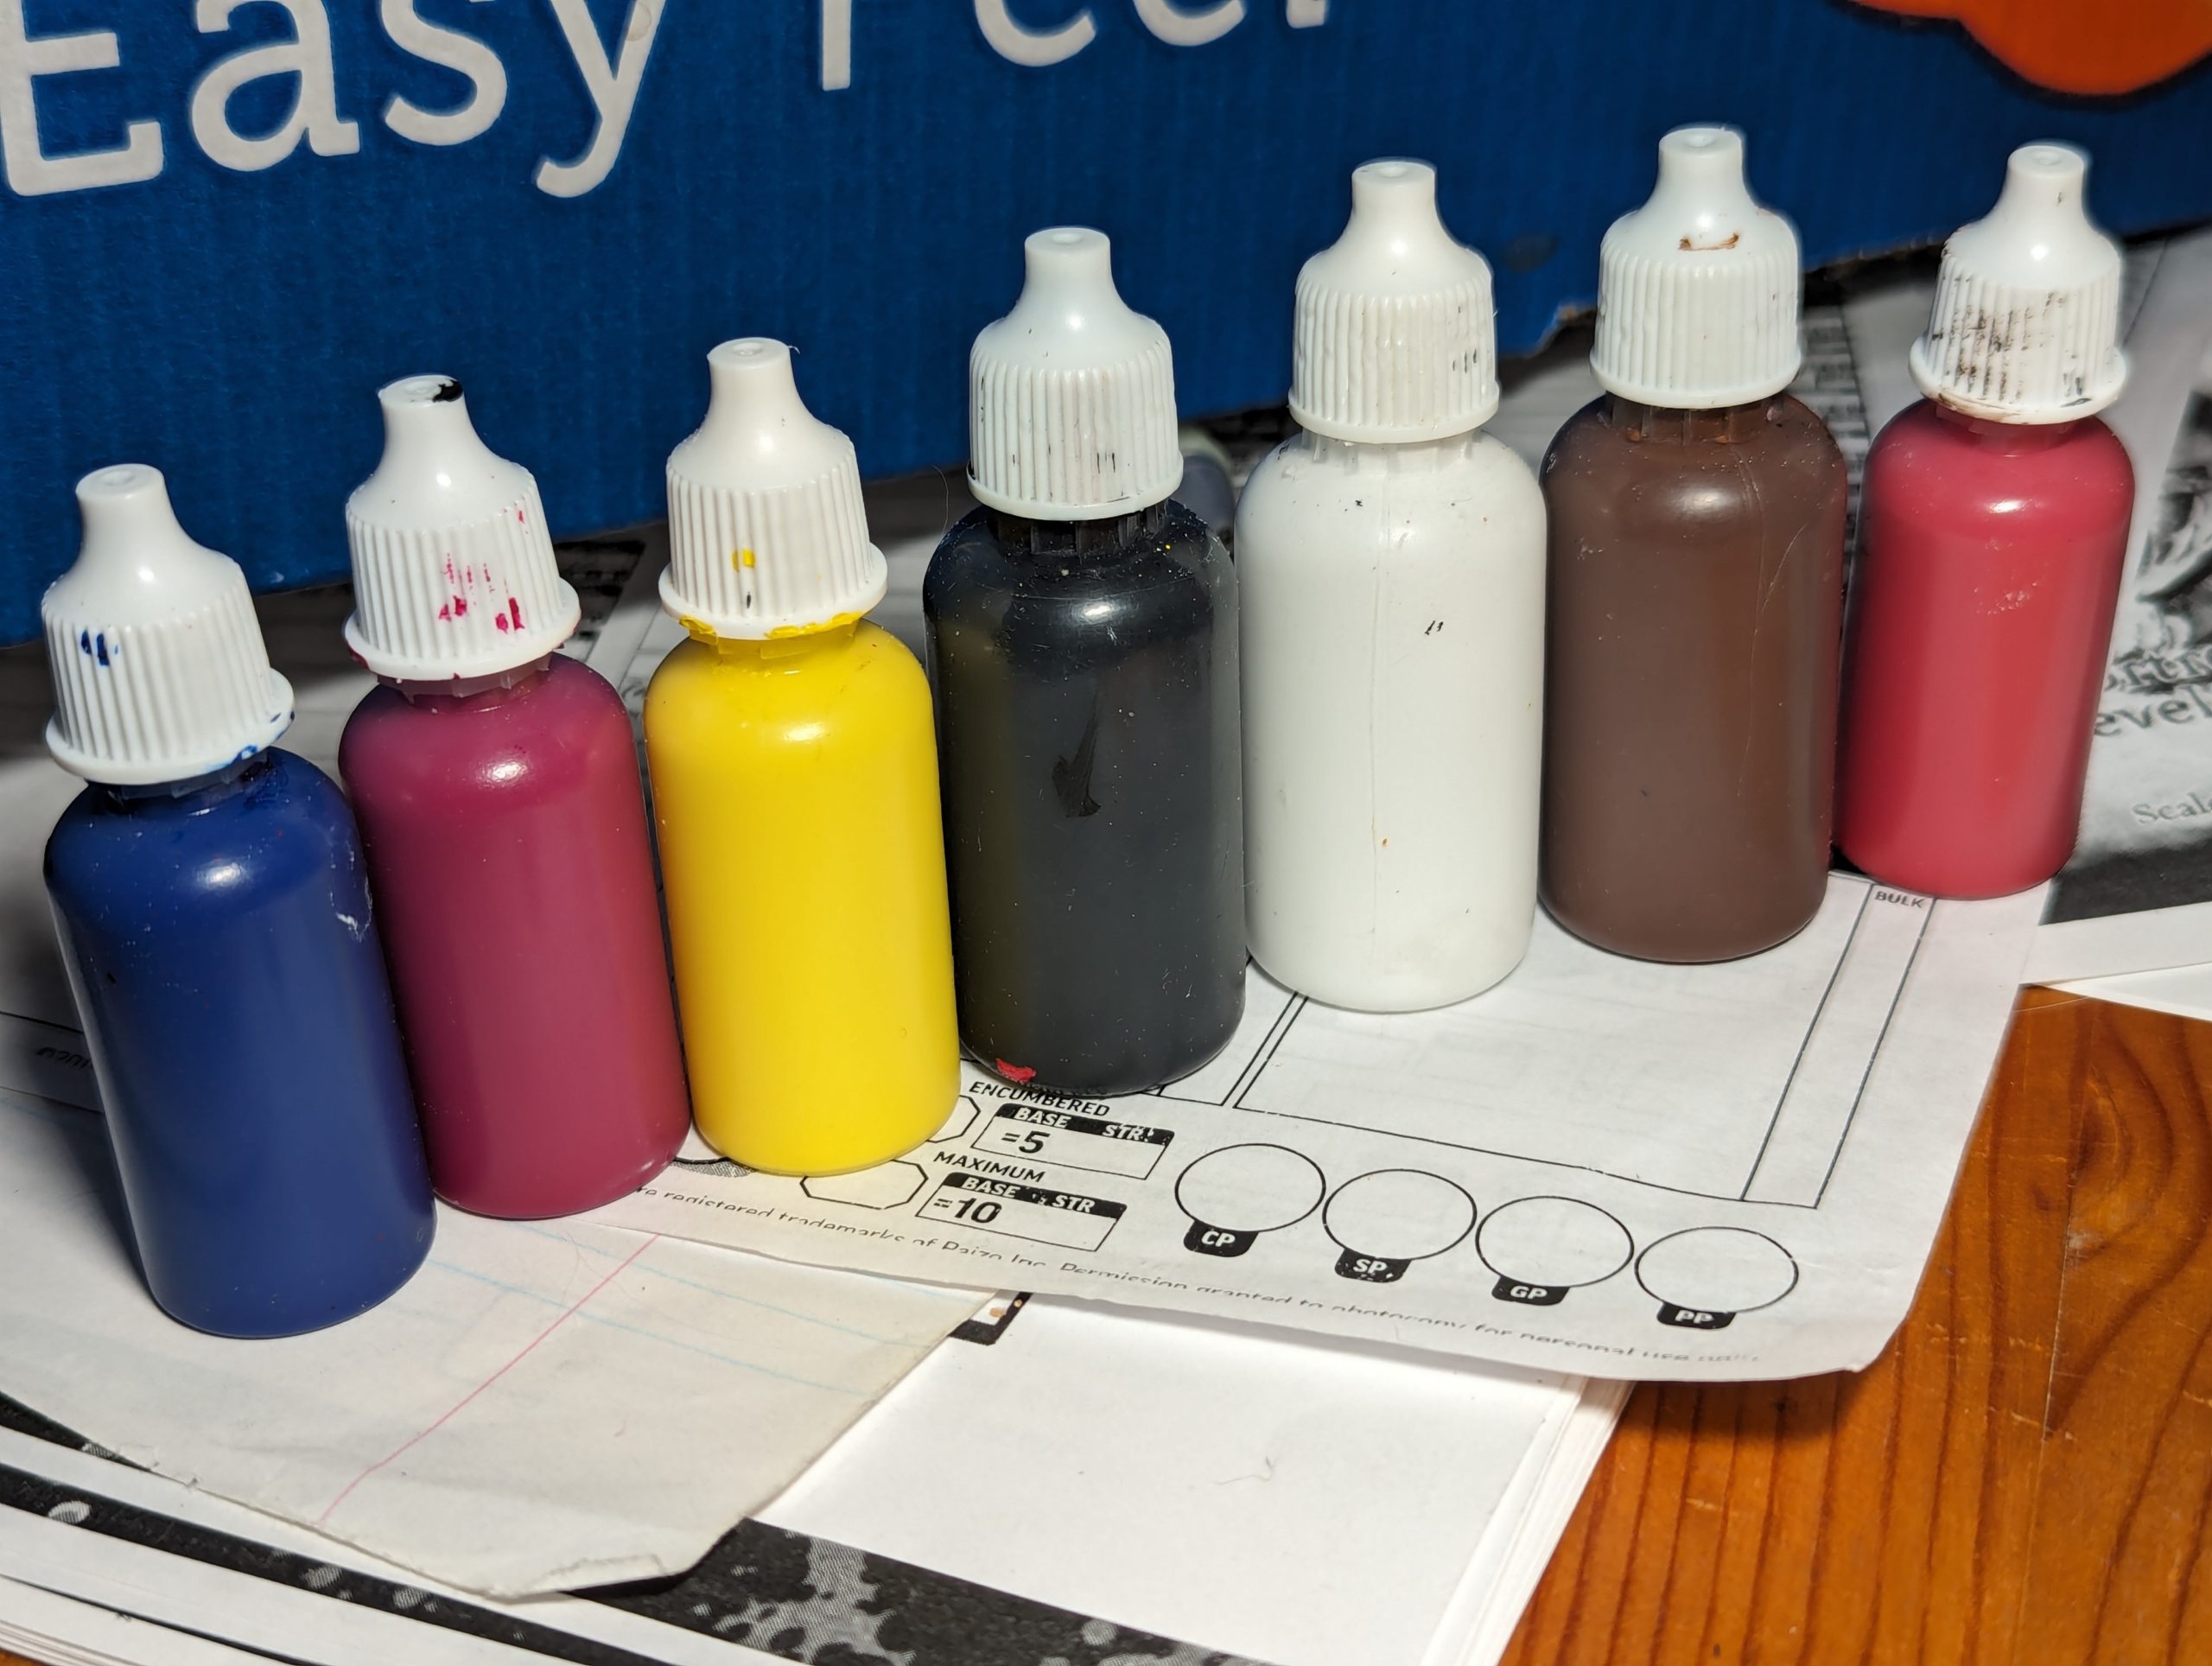
I buy everything at the art supply store. You want heavy body acrylics, which are the paints that come out so thick they’re nearly solid. Tri-Art is the “affordable” artist brand but I’ve found no real difference between that and the premium brands, because they’re all artist-grade and work fine on minis. Heavy body gets you more density of pigment and less medium. Get a tube of single-pigment blue, yellow, and magenta. I recommend also buying a red and a brown because mixing a strong red out of magenta is harder than you’d imagine and it’s easier to start with a rich brown and mix away from it than mix up precisely the brown you need from scratch. My choices, from the supply available when I went to the store, were;
- Phtalo blue green (PB 15:3)
- Quinacridone magenta (PR 122)
- Arylide yellow medium (PY 74)
- C.P. cadmium red deep (PR 108)
- Burnt umber (PBr 7)
There’s nothing magic about those specific pigments. Talk to the staff, tell ’em what you’re looking for and why, and they’ll be able to help. You can get big cheap tubes of white and black from the craft store, or from the art store. I go through a LOT more of that than the colours because no matter what hue I mix up I’m constantly adding white or black or grey. Remember that you want single-pigment white and black, and make sure the black paint you’ve got is using black pigment (PBK), and not a very dark blue (PB). One last thing of note; don’t lick your brush. I understand most of the pre-mixed bottles you get from Army Painter or Citadel are certified non-toxic. Cadmium, for example, is not. Don’t lick your brush for a point, don’t let pets drink your paint water, and start using differently shaped cups for your drinking. If you start airbrushing, buy CMYK airbrush inks that won’t poison you instead of thinning cadmium or chromium or lead or arsenic or mercury and vaporizing it in the air you and your family breathe.
You’ll also need to buy some “wetting agent” (a surfactant, for which some folks swap out dish soap or isopropyl alcohol) and “matte medium” or “matte varnish” (basically the same thing, and makes the paint stick). You dilute the wetting agent in water at something like 1 drop in a quarter cup- the bottle will have directions. You mix that diluted wetting agent 50/50 with matte medium, and that’s what you dilute the heavy body acrylics with. Using pure water (which is the solvent for water-based acrylics) isn’t exactly a problem but thick paints need a lot of thinning down and if you’re not using a medium to keep it sticky you’ll get some pretty vicious beading when you try to apply it. You might want to pick up some gloss medium for a spot topcoat if you want to do lenses or eyeballs or wet effects (see later about matte varnish).
Buy a bag of half to one ounce or 15-30ml-ish dropper bottles on Amazon (or a half dozen at your local hobby shop). You’ll get about 30 from Amazon, which is far too many. Fill one bottle each with your paints. Pull the nozzle out, squeeze the bottles kind of empty of air, stick the open paint tube to the nozzle-less bottle, squeeze paint into the bottle while letting the bottle expand. Tap the base of the bottle gently to let the paint settle (might need to poke it with a needle to release air), repeat until it’s full enough. Wipe the top and threads, replace nozzle. Mix up a small amount of that water-matte mix and pour it into several other bottles. You can now dilute a tiny drop of e.g. pthalo blue green into a whole model’s worth of more liquid paint applied in two thin coats.
Watch some watercolour paint mixing videos for the basics. Experiment. The range of colours I can get now is substantially wider than when I first started because I’ve learned about saturation and tone and colour theory and stuff, but if you start mixing you won’t be wasting a whole lot of paint anyway.
Supplemental notes
Prep and finish work, and tools, aren’t strictly CMYK, but I’ve been using them the whole time and it might have had a positive impact on my experience. If you’re just starting out, buy some brush conditioner and a couple of cheaper synthetic round point brushes to learn brush care on, and maybe a sable brush or two once you’re confident you won’t destroy them by jamming paint in the ferrules. I use a size 2 or 3 to do most of my surface area and a 00 to get into cramped areas.
You’ll need to prime your models. I now use my new entry-level Iwata Neo airbrush for priming and varnishing, and I swear by it in part because I live where it’s very cold and dry and spraying models in -40C is a good way to screw up rattle can paint. But! I spent years using Citadel’s black and white primers at >0C and it worked great. Some folks swear thin coats of retail paint like Krylon works well, but in my experience they get finicky with temperature and humidity, and where I live has extremes of both. TL;DR Citadel is worth the money as long as it’s warm out and are great for batch-priming large numbers of models, and airbrushes give more control that a new painter probably doesn’t need.
In my experience you’ll need to matte finish models for protection and because the art store paints you’ll get are likely to be pretty glossy even with the matte medium mixed in. A spray can of Tamiya TS-80 works beautifully in my experience. Or you can spend like $300 on an Iwata Neo kit and some AK ultra matte varnish, but that’s not really a CMYK issue and is a lot of investment for a new hobby.
Finally, I’ve been using a homemade wet palette for years with no problems. Get a plastic sandwich container with a lid, about 4 or 5 inches square and an inch or two high. Put two layers of paper towel in the bottom, cut a bunch of parchment paper to fit. Get the paper towel wet, pour out the excess water, add a sheet of parchment paper, and you have a wet palette. Swap the cover sheet when you start a new project or run out of space for paint.
All the ways in which everything I’ve said is absolutely wrong
This method isn’t great for painting armies. I can scrape by on familiarity with the process to get close colour matching, but a friend of mine asked me to paint some Urbanmechs like a Kurita lance I’d done for him months ago and I was nervous about it. I’m helping a friend paint a couple thousand points of 15 year old Guardsmen and Marines, and I told him straight up to buy speed paints.
I have a nail polish stand to hold my bottles. One row is for my CMYK, my white, my red, my brown, and a couple bottles of diluted medium. One row is for a dozen washes I’ve mixed up with my diluted medium and some acrylic inks I bought for CMYK airbrushing. And one row is for metallic paints. I can’t do non metallic metals, I’ve tried, and I’m not sure I ever want to bother. Maybe when my skills need evolving I can try again, but until then I’m very happy to shred some cheap amazon brushes with mica flecks to get gold and bronze and steel and silver, etc. CMYK painting doesn’t mean you never need another paint again. I’ve got a bottle of Nihilakh Oxide because for the longest time I couldn’t figure out how to mix that colour myself (especially as a wash). Some friends bought me contrast paints and I’ve used them and enjoyed them. I mix my own texture paints and I have my own crackle medium but I’ll be damned if I haven’t been thinking about getting some Dirty Down rust. CMYK is not a cure-all. There’s going to be maybe 10% of the hobby that still needs some technical paint that I can’t, or don’t want, to make myself.
I don’t suggest this for beginners because it adds complexity, and beginners need some easy wins to get their feet under them. I don’t suggest this to established painters, because they don’t need my advice and they’re already half a mortgage into their preferred paint lines anyway. In fact, I’m not suggesting this for anyone. I’m just describing how I do it, because some folks have told me they’re interested in trying it out themselves.